Slit lamp photos with IPads and iPhones. The easiest and most cost effective way to take photos in all of your exam rooms.
Eyephotodoc packages for iPads start at $1600 and all smartphones from $595 including collar and Background illuminator!
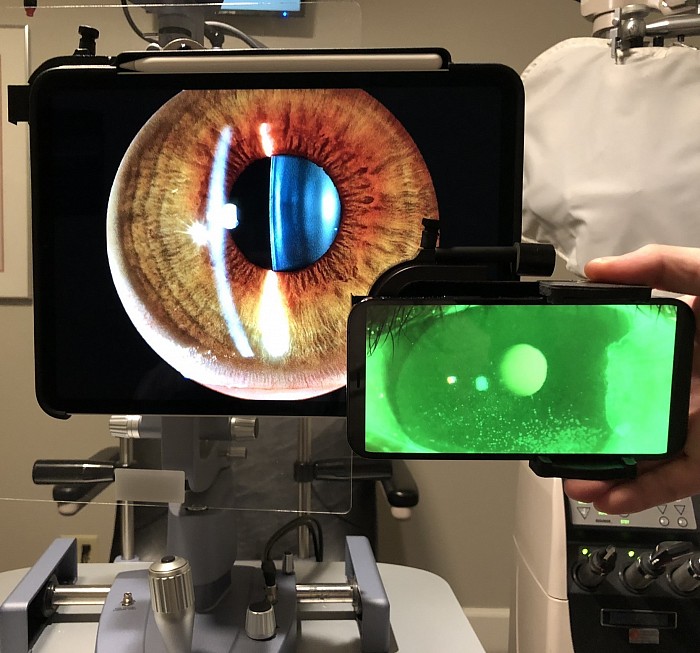
iPads or smartphones
The EyePhotoDoc is a convenient and efficient tool for eye exams, offering simplicity and high-quality photo documentation directly integrated into electronic health records (EHR). Its compatibility with Apple™ technology makes it user-friendly and versatile. The ability to easily capture and record images without disrupting workflow is beneficial for both practitioners and patients. Additionally, the device's compatibility with slit lamps and its use in over a hundred clinical research trials further highlight its versatility and reliability in the field of ophthalmology. It can be used for image acquisition for free ai programs such as FIJI (click underlined link)
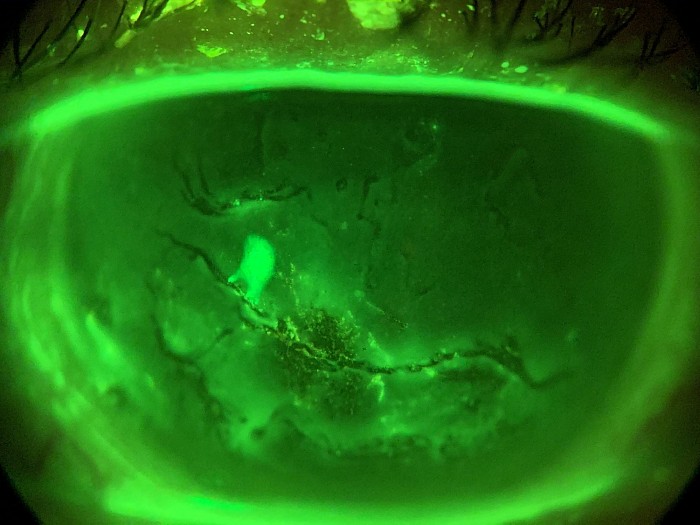
Gone are the days of the Schirmer tests, TBUT, and serum osmolarity etc… Our dry eye diagnostic option shows the slightest punctate stain and also videos the tear film flow. We also can see the meibomian glands and vessels. Click here for more information
Photos enhance our EHR charts and our reimbursable. Words simply do not describe findings as well as photos. Slit lamp photography was difficult before the EyePhotoDoc. The Apple camera automatically finds the optimal camera settings and you can compose it on the screen. The smart device uploads your photo into your iCloud account and to all connected computers.
Made for IPad or iphone
Apple partner
Made for Apple products and now also all smartphones
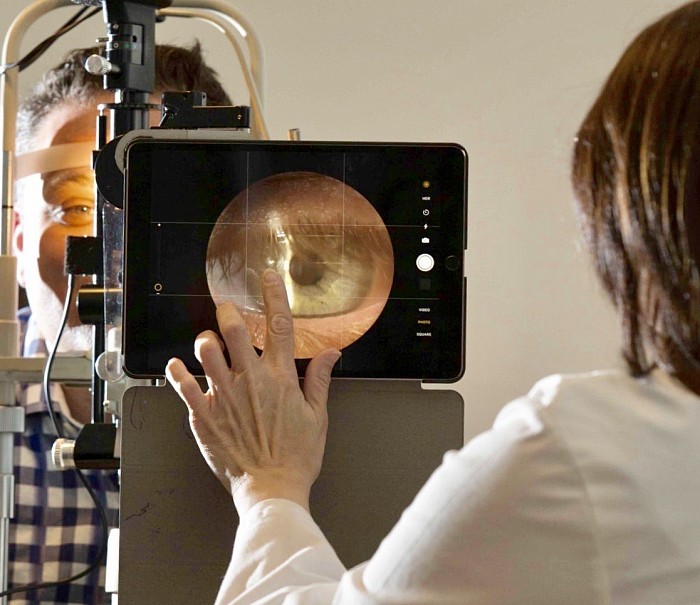
Clinical photo using EyePhotoDoc™️
No photographic experience is necessary to take slit lamp pictures.
If you can take a picture on a phone, you can take a slit lamp photo. The image on the screen allows perfect composition. This is a transformational device for daily eyecare.....
Look how easy it goes on and off!
FaceTime video demonstration
Schedule a free 30 minute FaceTime demonstration with us in the contact section. We do them Tuesdays and Thursdays. Experience the ease of use and quality of photos.
The most advanced dry eye photography ever!
Photos can be used for diagnosis, and tracking treatment and in all your exam lanes
The EyePhotoDoc slit lamp camera is an inexpensive high quality camera adapter which is TRANSPORTABLE to all your exam lanes. You can now follow patients’ findings using past photos in any of your lanes. It never slows you down since the adapter slides on and off in seconds. Never move a patient for a photo.
Every diagnostic photo can be put into your EHR
You can easily send photos to any EHR. Click here to learn how to view a you tube video to set up a free account. https://support.apple.com/guide/icloud/welcome/icloud
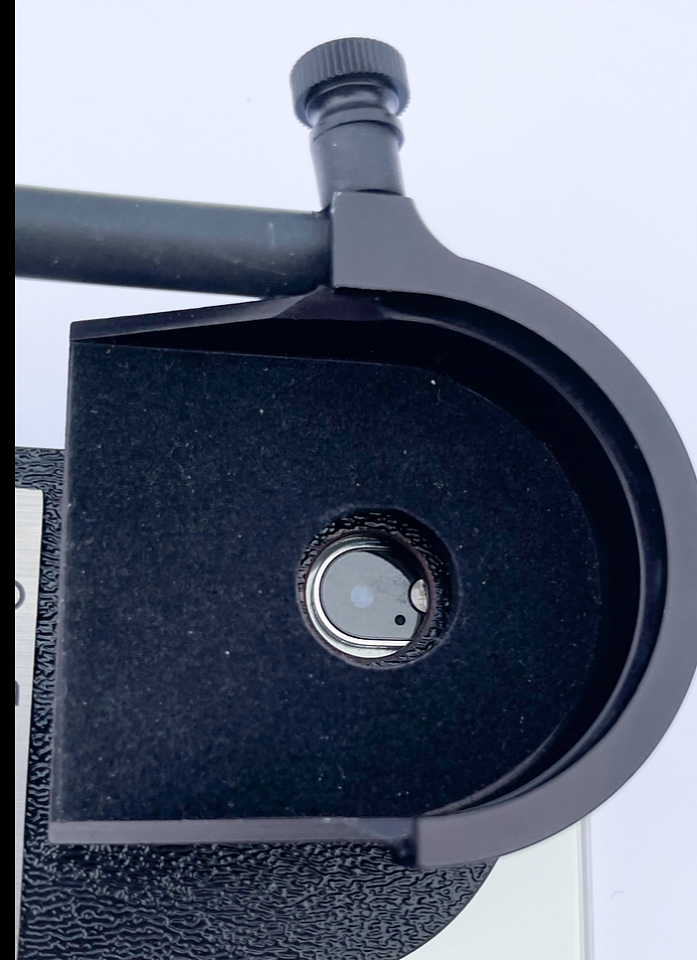
Universal receiver fits custom collars on your slit lamp
The EyePhotoDoc receiver fits on most scopes having our eyepiece collars.
Simply use the same iPad or iPhone on all you slit lamps with an ocular collar. Seen on the left is the universal receiver that fits over our custom collars. See below

Custom eyepiece collars for Topcon, Haag-Streit, Marco....
Exclusive custom Eyepiece Collars for all your slit lamps
Our system of custom collars allows most slit lamp to fit our EyePhotoDoc cases. A small custom collar is left on each slit lamp eyepiece to fit the Eyephotodoc receiver. Click here to learn more.
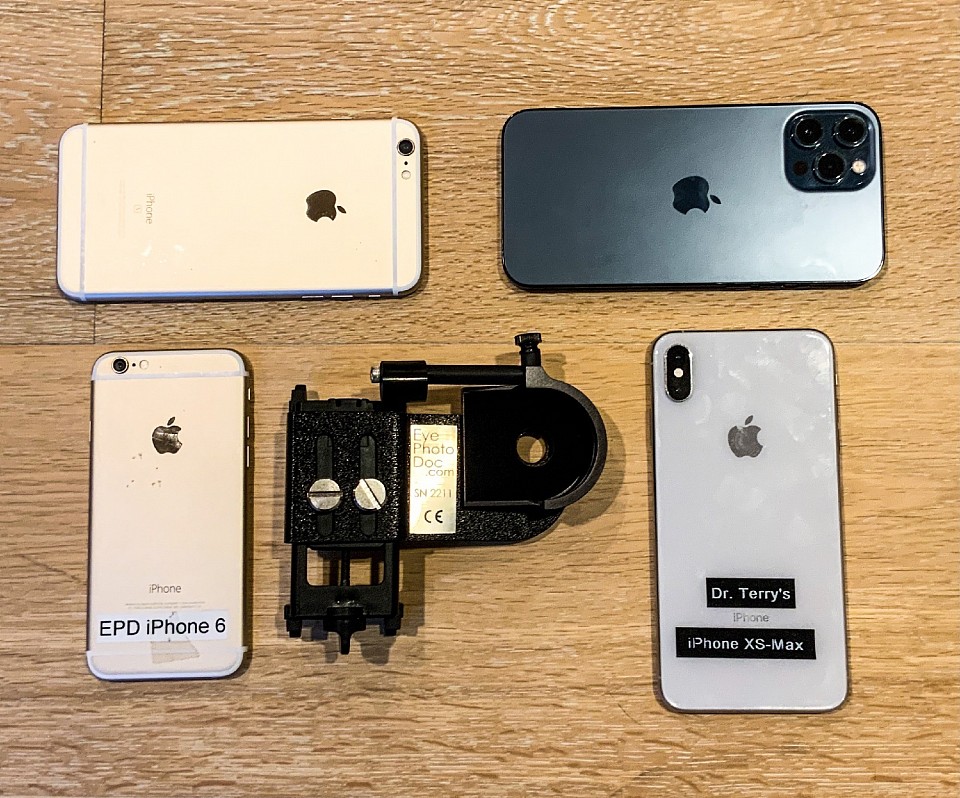
Slit lamp camera fits all smartphones
‘Universal’ smartphones Eyephotodoc only cases start at $595 and go up
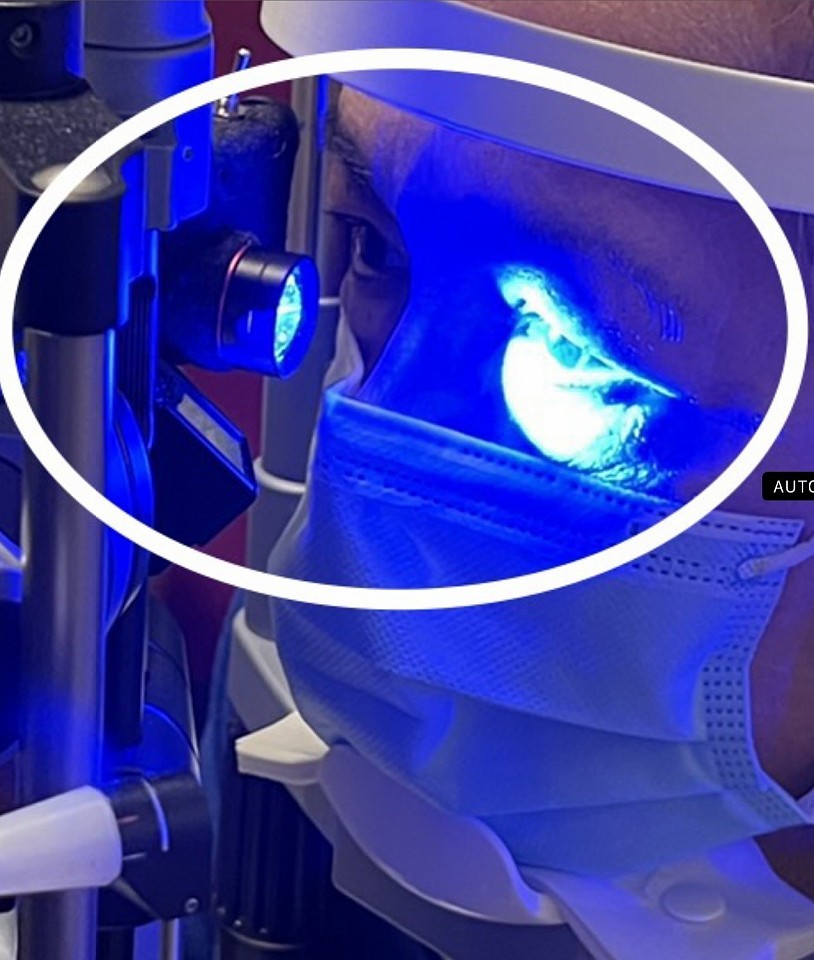
New LED Fluorescein wide field concentrator/exciter
Follow and treat ocular surface disorders with astonishing detail!
DED has numerous findings. Word descriptions are not as useful as photos. Our special Fluorescein LED exciter and yellow Wratten barrier filter blocks blue for superior visualization of punctate stain and tear film breakup time.
Special installation help
Many of our customers and clinical research studies have requested a special FaceTime service for guided installation and basic use. Contact us for details.
See more photos on our Instagram page link below
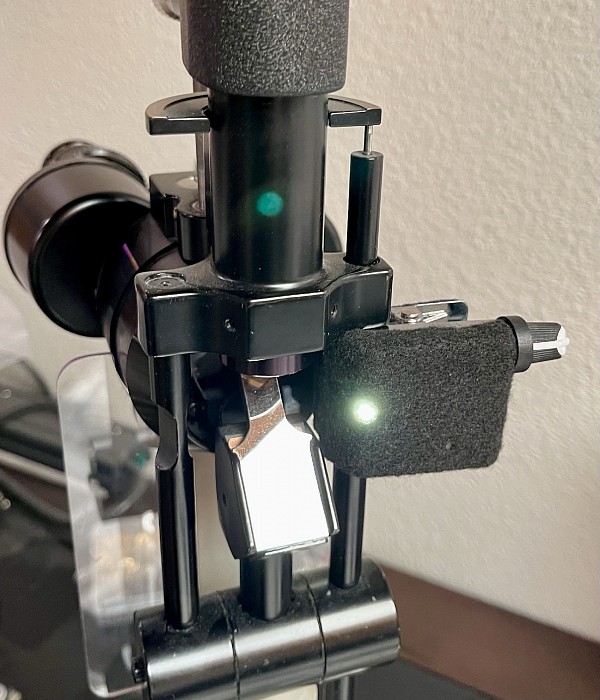
Clip on tower illuminator
Every photographer knows lighting is critical. Through a decade of research, we have developed the perfect lighting for professional results. It clips on the light tower and has a color temperature correct LED and is rechargeable. An advanced system in a small package.
Reading this web page is designed to be more informational than ČME credit. All our equipment is sold at our cost
All the techniques we discuss can be done with other cameras although we have maximized the results. Our commitment is to modernize health care for the benefits of the doctor and patient. Dr. Clifford Terry
Collars for most slit lamps
We have collars that fit most slit lamps. However if you have a special slit lamp we do not have in our collar inventory we will send a caliper to measure it. Contact us for details.
